Zoom OAuth Setup
Requesting the Required Scopes
You'll need to request a few scopes on your OAuth app in order to use this integration.
If you already have an existing OAuth app and you're already having your users grant OAuth permission on Zoom, you can request the scopes on that app.
Otherwise, if you've created Zoom SDK credentials to authenticate the bot, you can request the scopes on that app. You don't need to create a separate OAuth app, as the SDK app can also provide OAuth functionality.
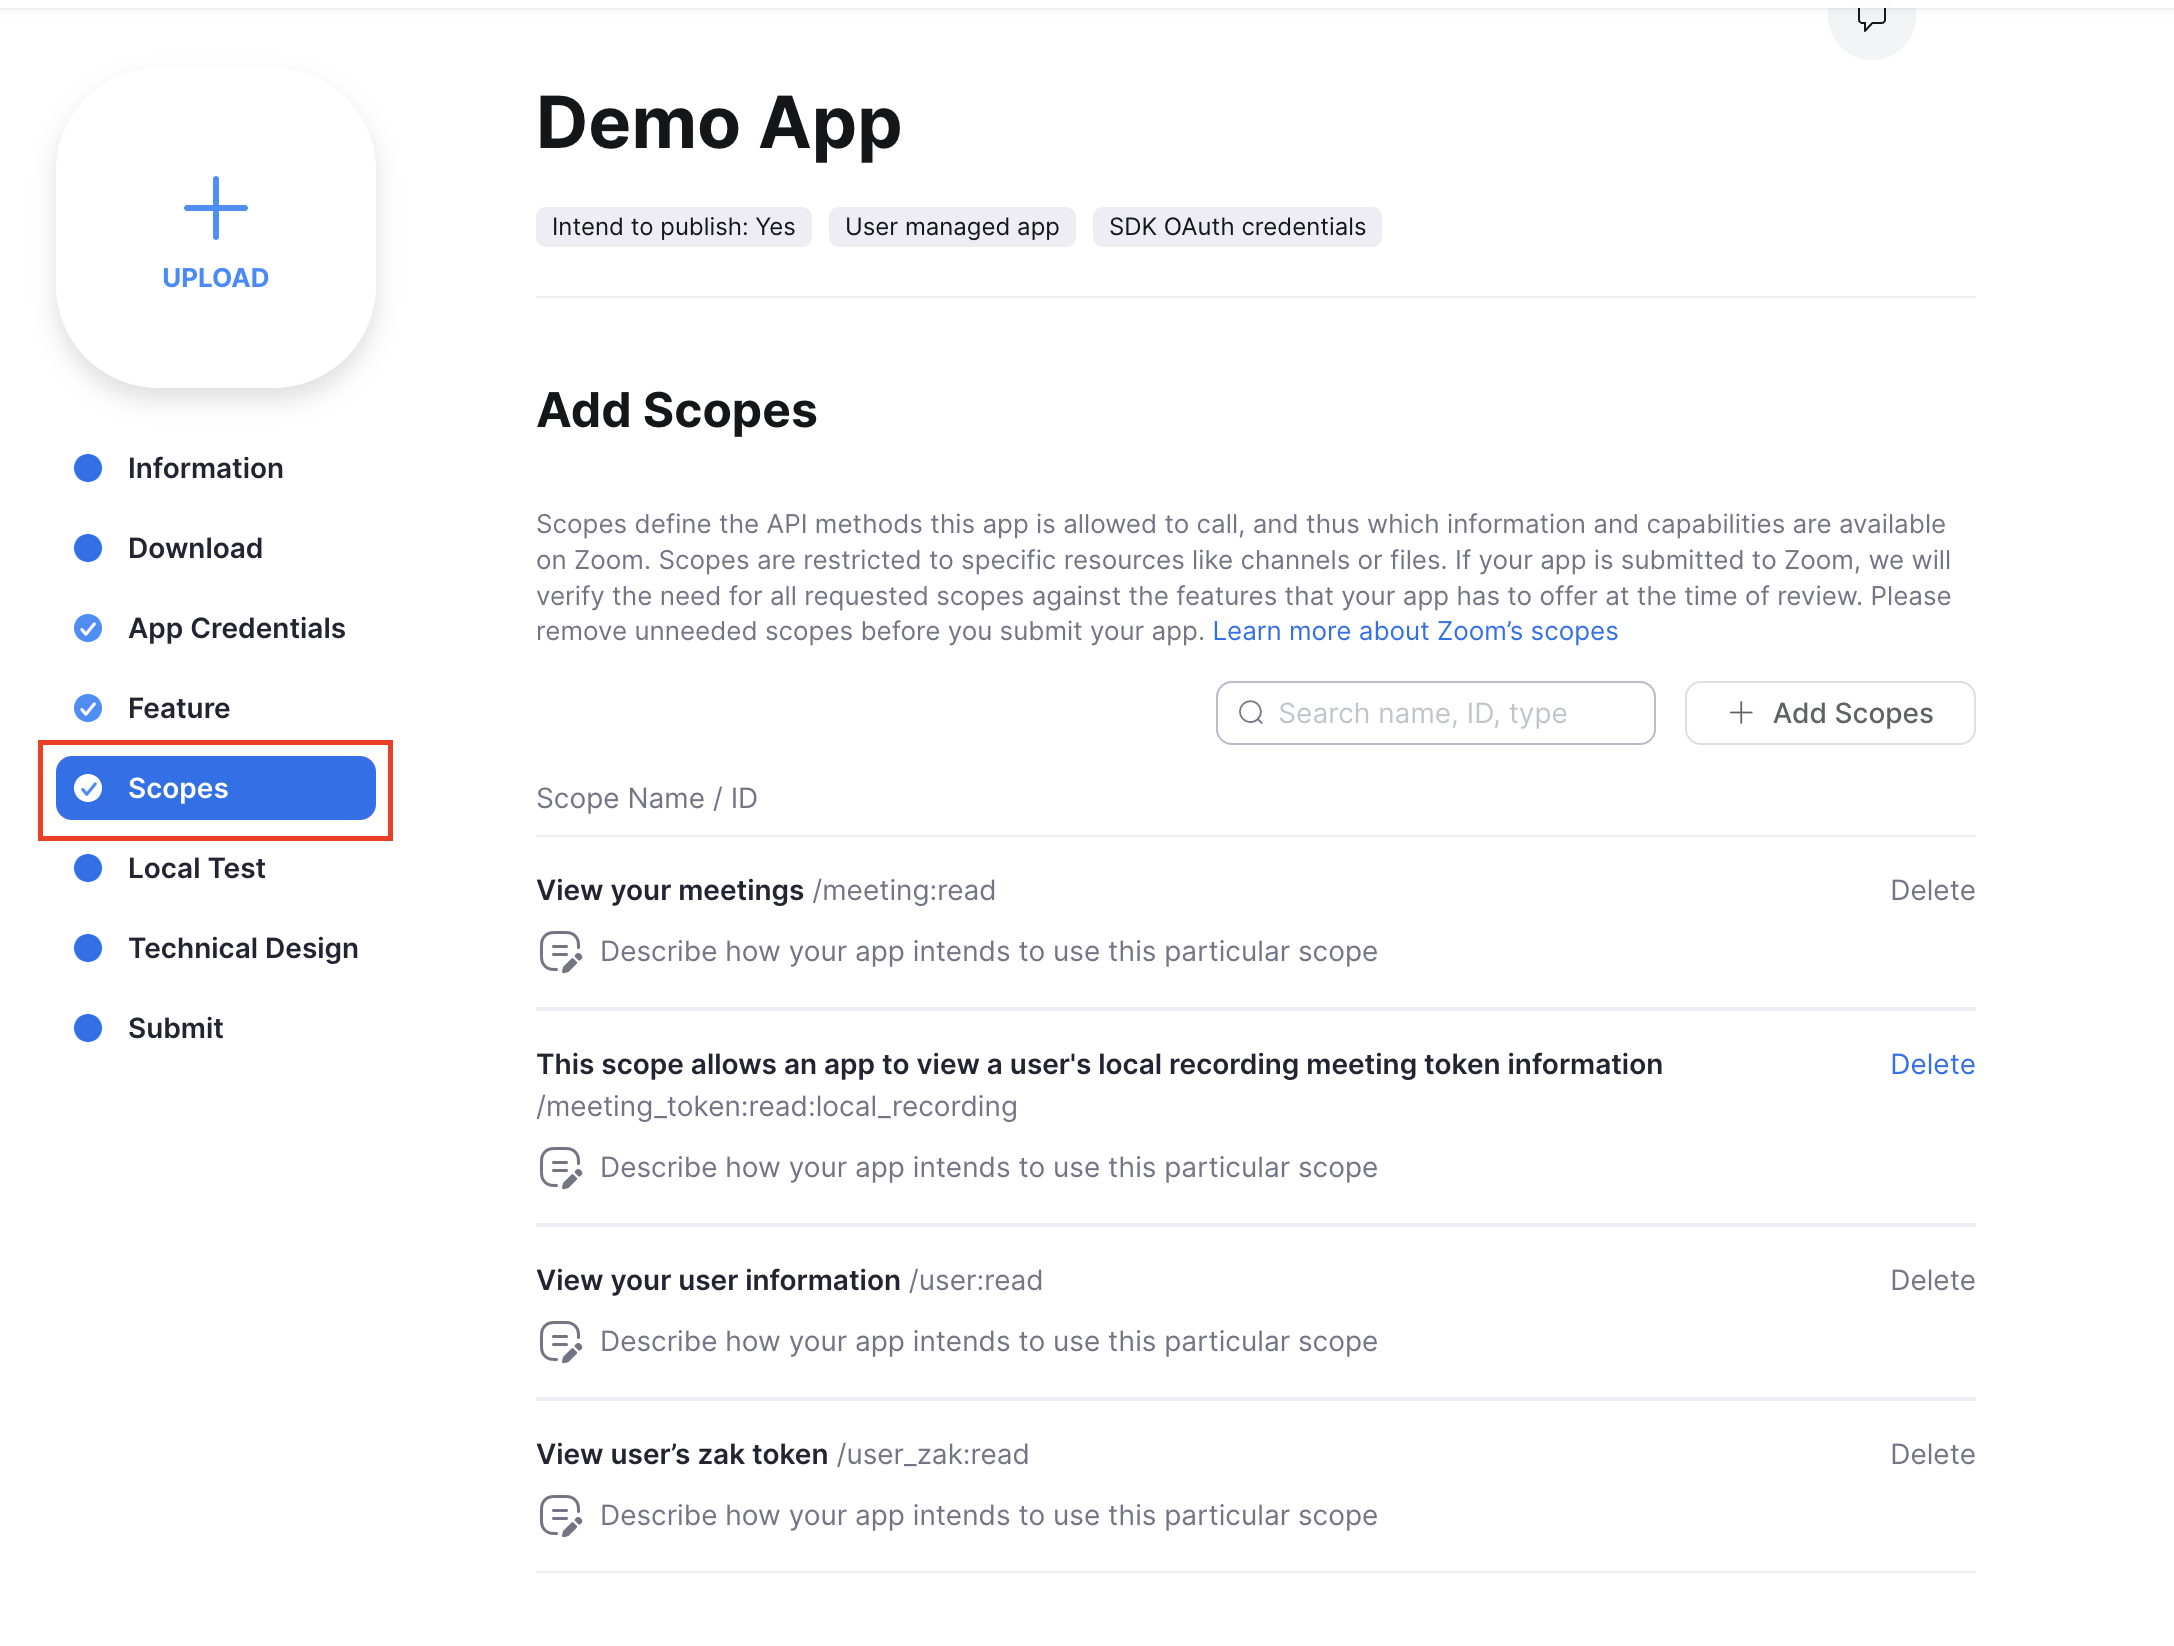
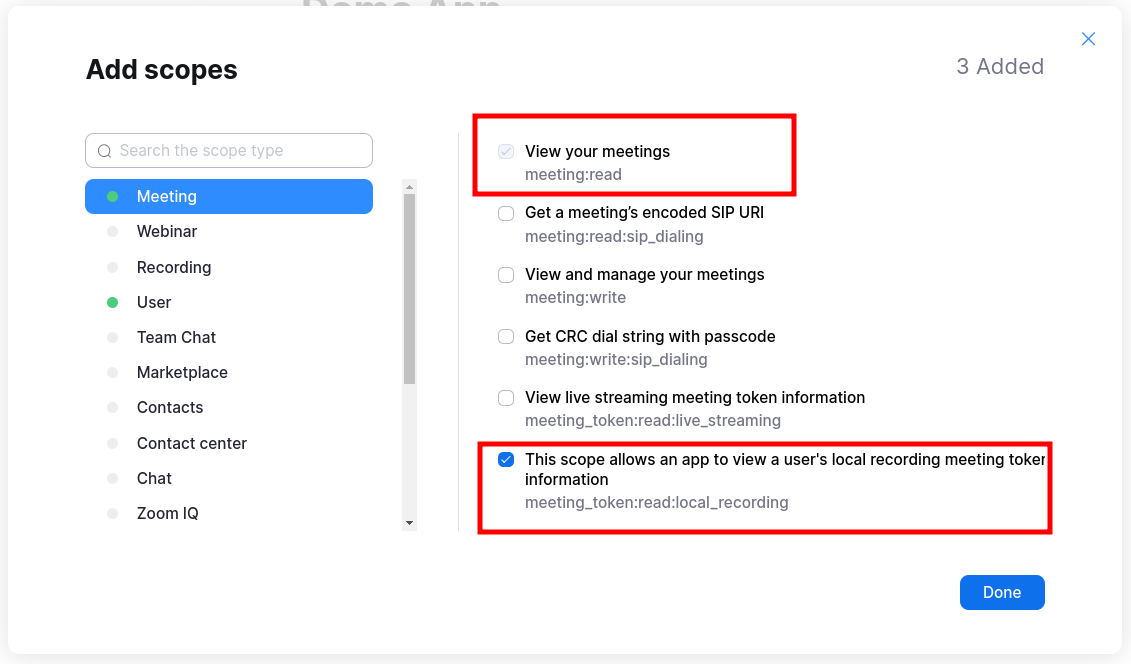
Select the following scopes
- From Meeting :
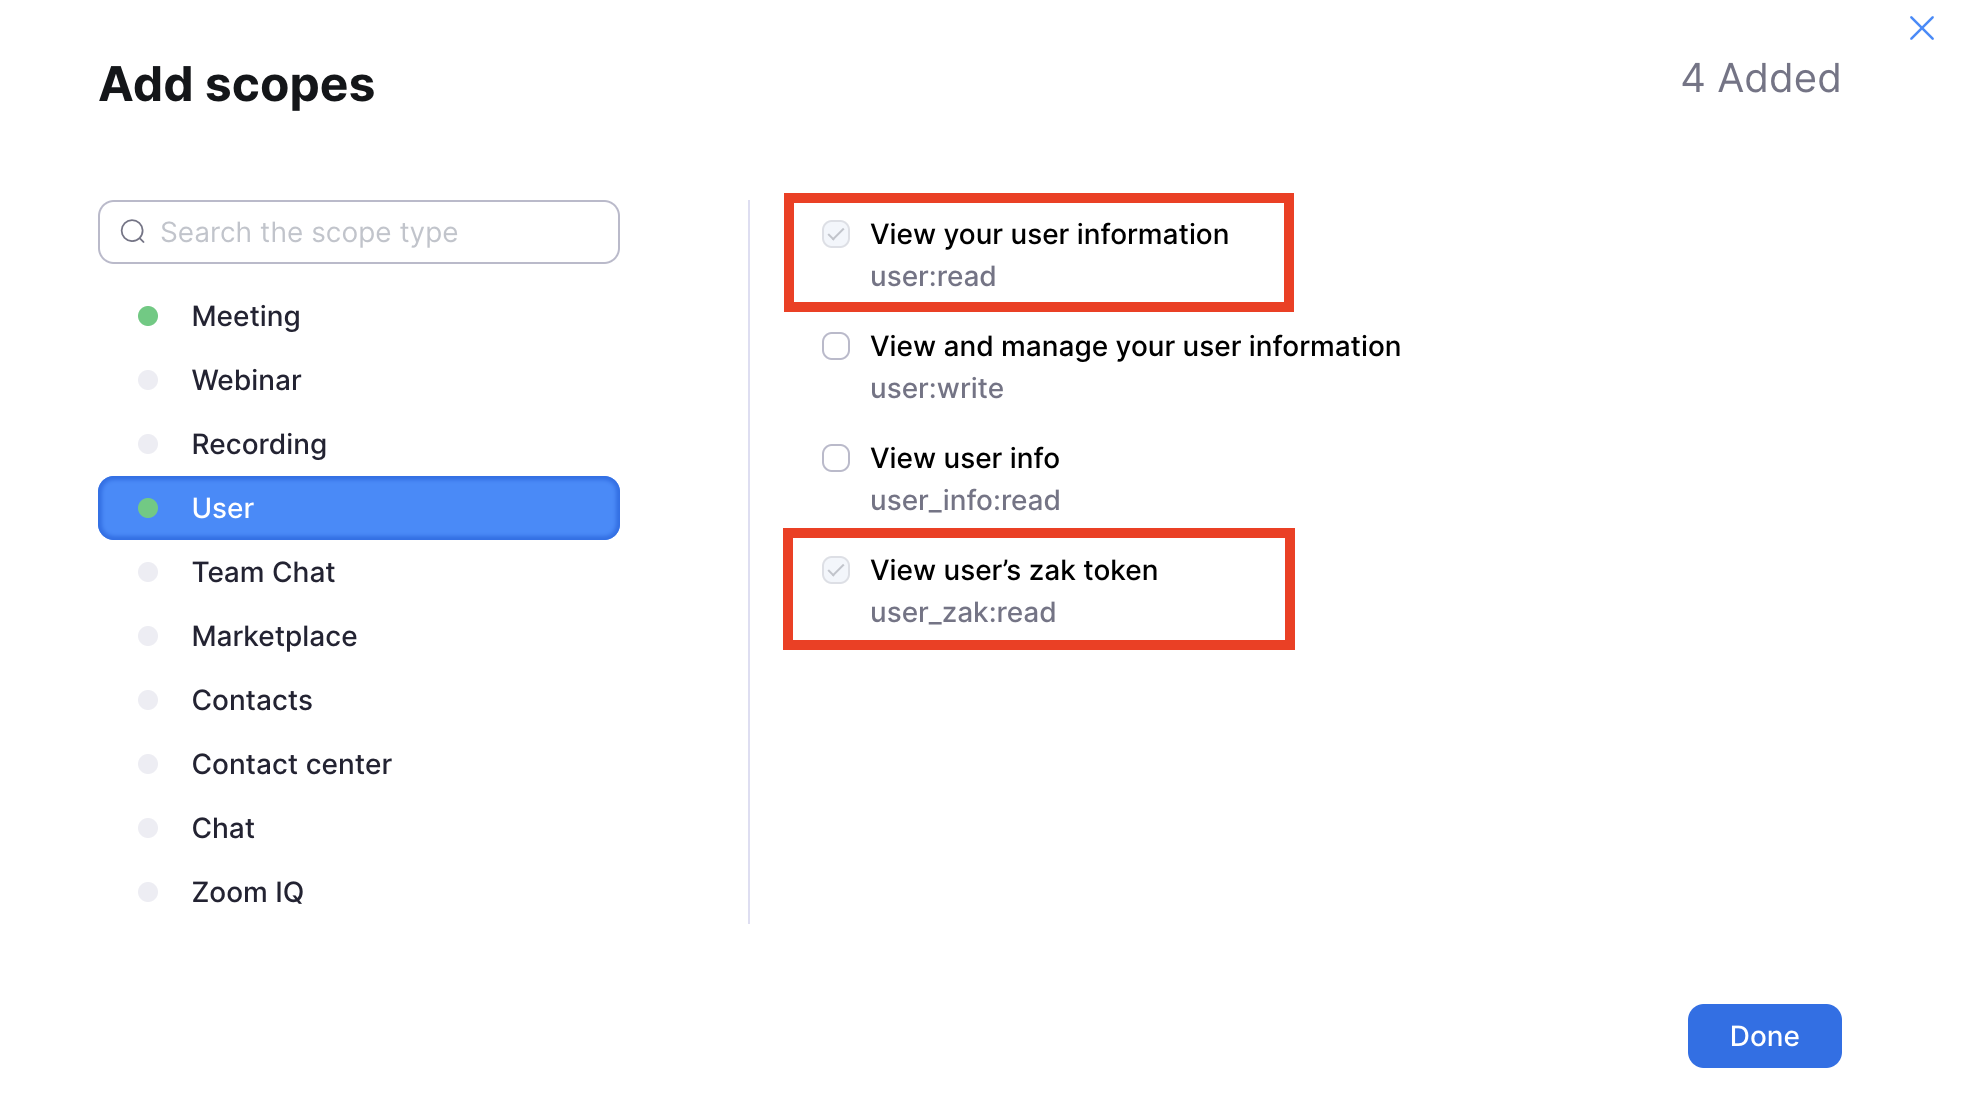
meeting:read(required to sync meetings) andmeeting_token:read:local_recording(required to generate local recording token) - From User:
user:read(required for retrieving user's PMI) anduser_zak:read
PMI's and the
user:readscopeTo make it obvious to the Zoom reviewer why this scope is needed, it's recommended to add a note to your application explaining this. We recommend the following:
Our application uses the OAuth integration to provide a seamless recording experience for users. Since personal meeting ID's are commonly used to host meetings by our users, and we'd like to provide the benefits of OAuth permissions for all of their meetings (including meetings hosted using their PMI), our application need this scope to fetch users' personal meeting IDs so we can provide OAuth tokens accordingly. Without the View User scope, we can't provide these tokens for Personal Meeting ID's, which would prevent our users from leveraging OAuth functionality for these meetings.
Registering your OAuth App Credentials with Recall
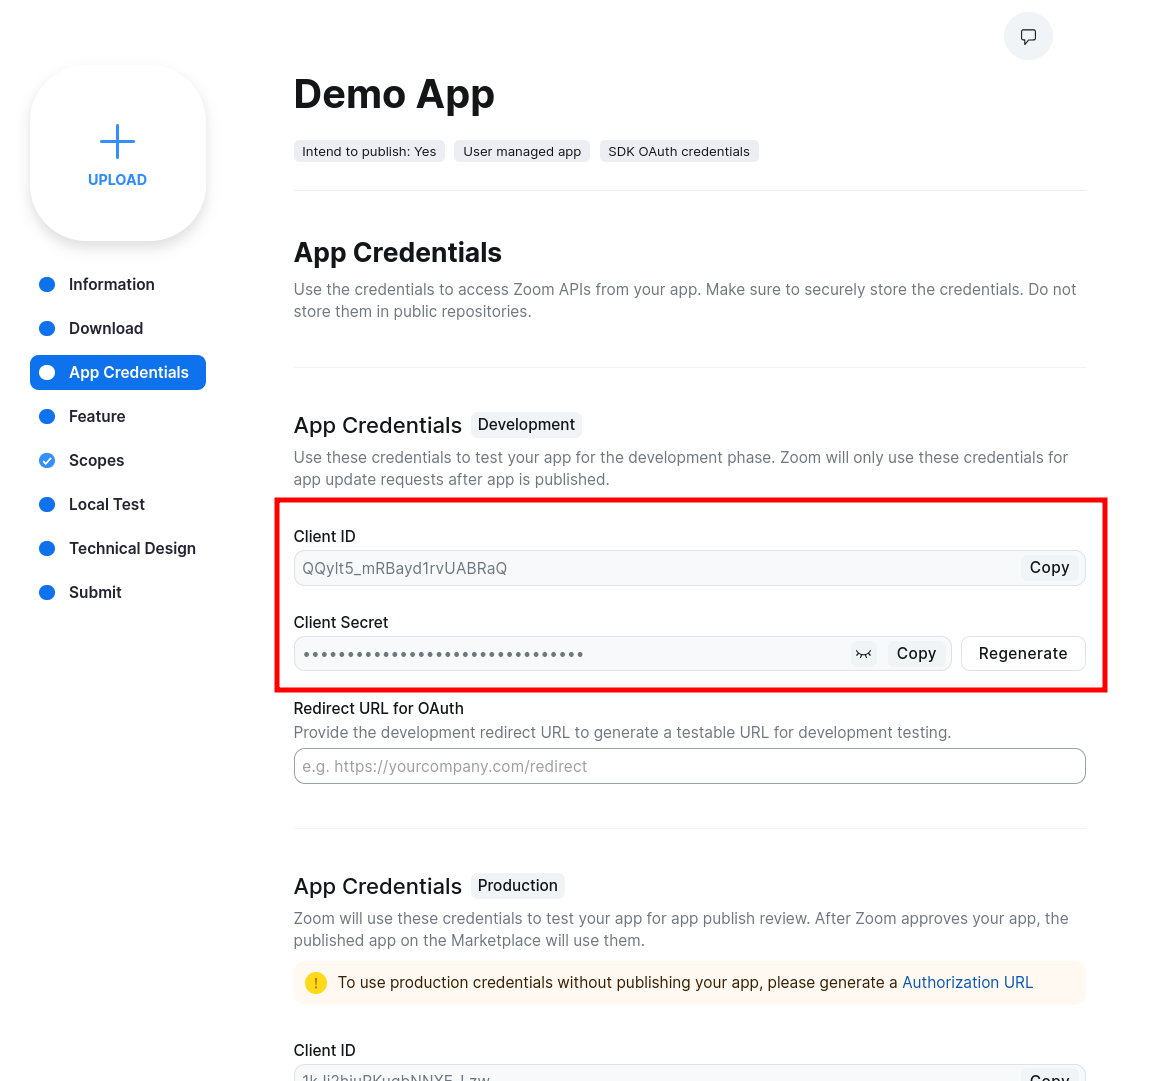
Once your app is created, click the "App Credentials" sidebar tab and note down the Client ID and Client Secret.
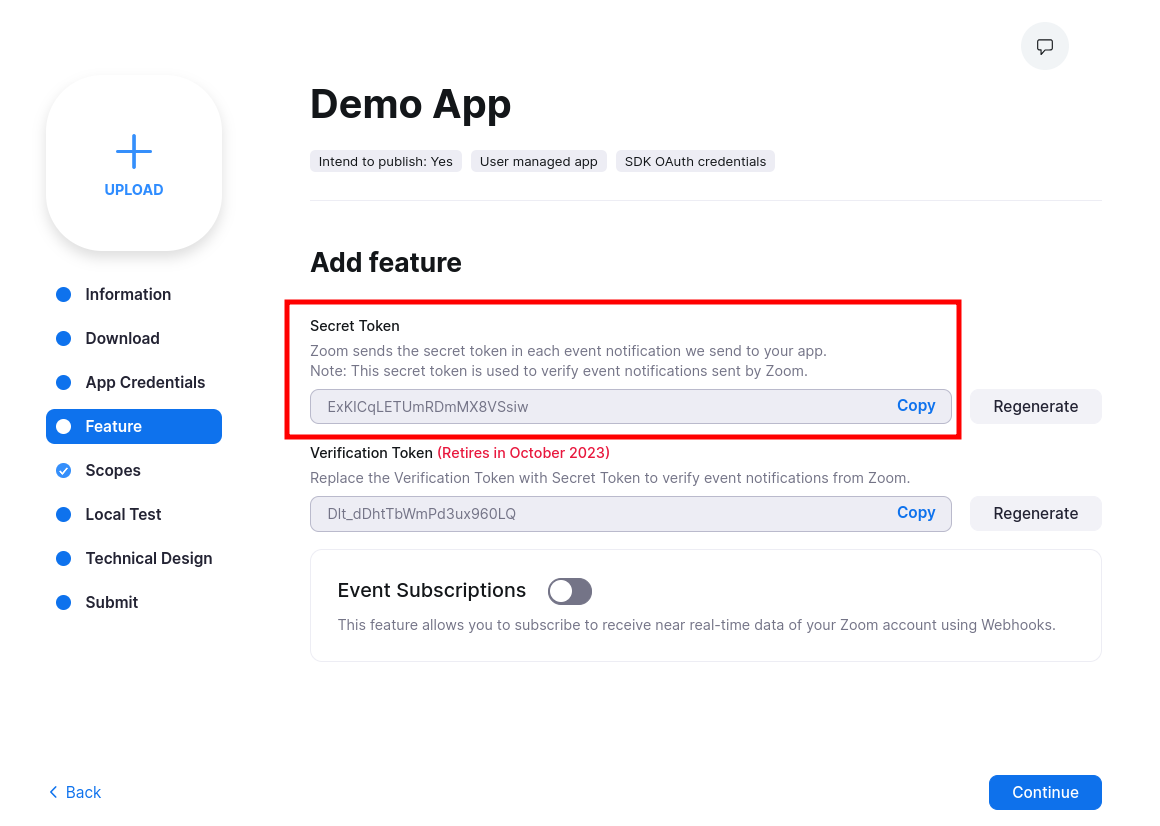
Next, click the "Feature" sidebar tab, and take note of the Secret Token value (ZOOM_APP_SECRET_TOKEN).
You'll provide this in the webhook_secret parameter in the next step.
Create the Zoom OAuth App in Recall
The next step is to create your Zoom OAuth App in Recall by calling the Create Zoom OAuth App endpoint.
Keep the returned ID!
Store the
idreturned in the response somewhere easily accessible - you'll need this later.This is your Recall Zoom OAuth App ID.
$ curl -X POST https://api.recall.ai/api/v2/zoom-oauth-apps/
	-H 'Authorization: Token YOUR-RECALL-API-KEY'
 	-H 'Content-Type: application/json'
  -d '{
    "kind": "user_level",
    "client_id": {ZOOM_APP_CLIENT_ID},
    "client_secret": {ZOOM_APP_CLIENT_SECRET},
    "webhook_secret": {ZOOM_APP_SECRET_TOKEN}
  }'


  // 201 Response example
  {
  	"id":"32721c6e-3acf-4511-851c-55772cfb34b7", // SAVE THIS FOR LATER!
    "kind":"user_level",
    "created_at":"2023-08-03T03:48:58.187545Z"
    ...
   }
Configuring Webhooks
In order to automatically fetch tokens for a user's Zoom meetings, Recall needs a way to stay in sync with Zoom as new meetings are created.
To do this, we have to configure our Zoom app to send webhooks to a Recall endpoint - a webhook endpoint specific to the Zoom OAuth app you just created in the last step.
Important: Zoom OAuth integration and bot behavior
Configuring webhooks does not cause bots to automatically join Zoom meetings. It simply gives Recall the ability to automatically fetch join tokens for any bots that you choose to send to these meetings.
To actually create a bot and send it to a meeting, they still must be created through the Create Bot endpoint or via the Calendar Integration.
The following are instructions to configure webhooks:
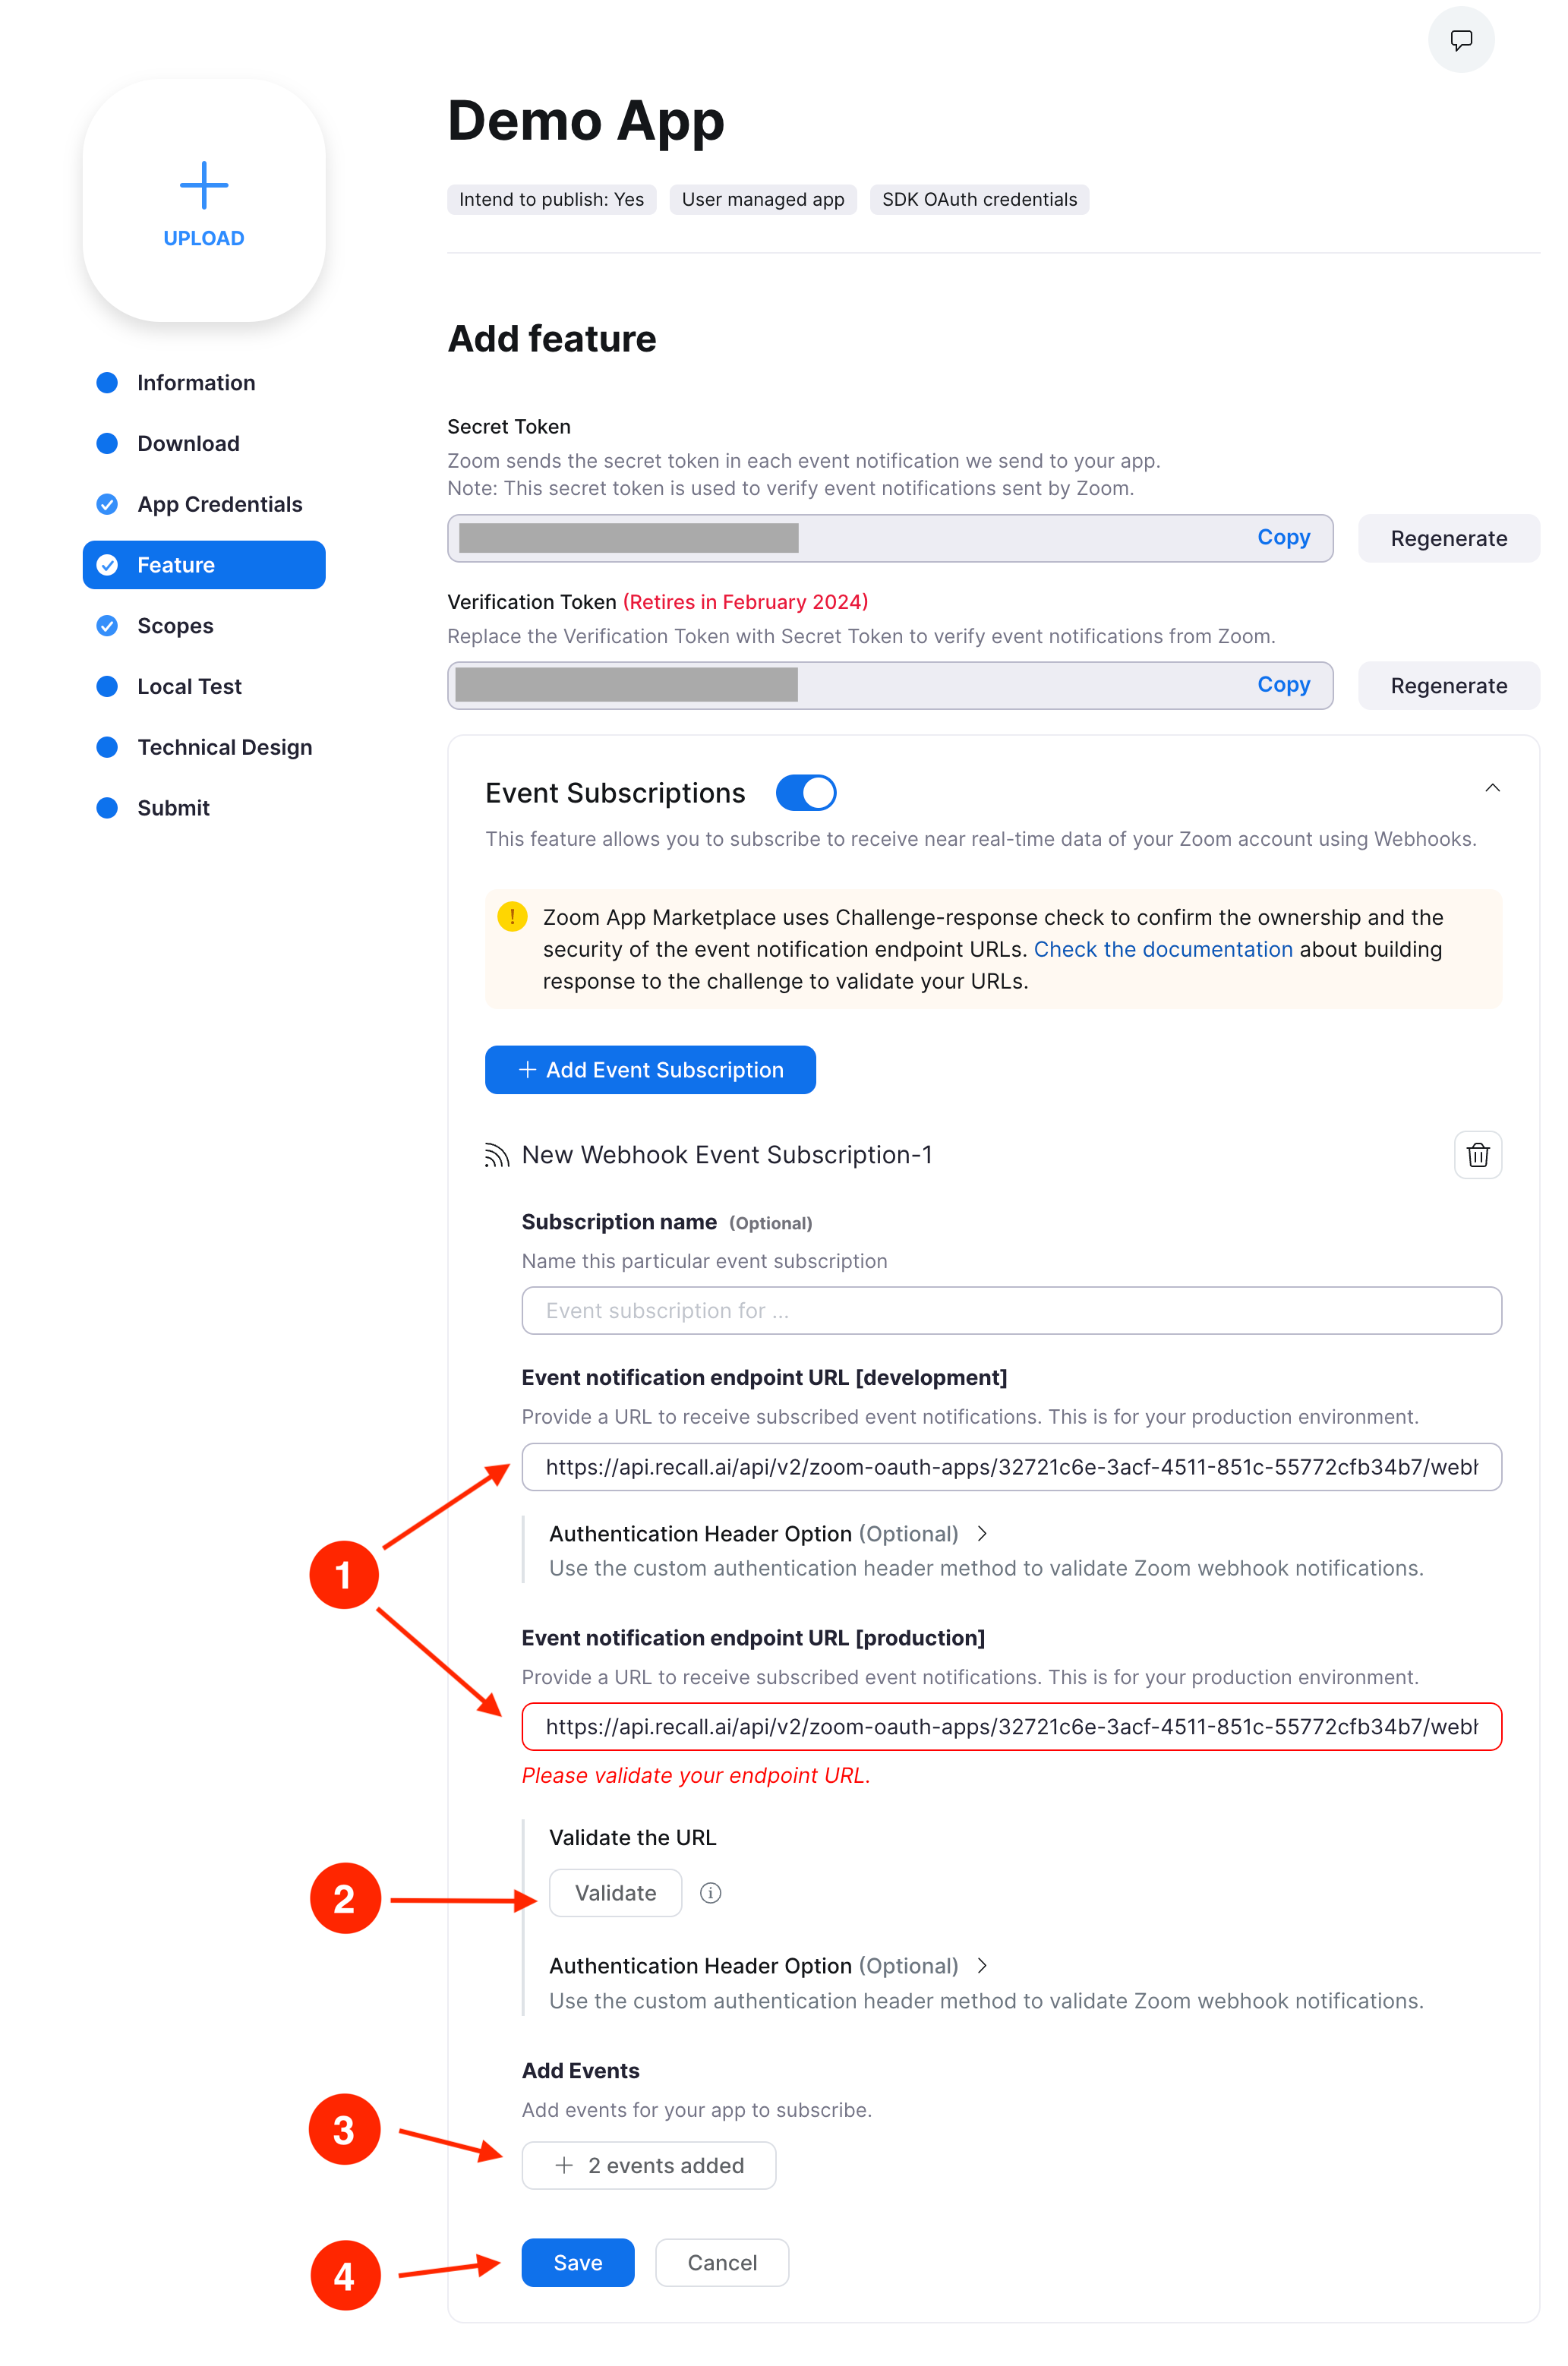
1. Fill out the Event notification endpoint URLs
Build your webhook URL using your Recall Zoom OAuth App ID:
https://api.recall.ai/api/v2/zoom-oauth-apps/{RECALL_ZOOM_OAUTH_APP_ID}/webhook
Do this for both development and production - these should be the same.
If your server needs to receive these webhooks:
- Enter your own server's webhook endpoint in these fields
- Forward every Zoom webhook received to the Recall endpoint constructed above
- You must include the
x-zm-request-timestampandx-zm-signatureheaders. - You must not modify the webhook body in any way
2. Click the 'Validate' button
This sends a test request to the URL to verify proper functioning.
If for some reason the validation fails:
- Check that your webhook URL is correct.
- Check that the
webhook_secretyou set while creating your Zoom OAuth App in Recall is correct.
3. Add the webhook events
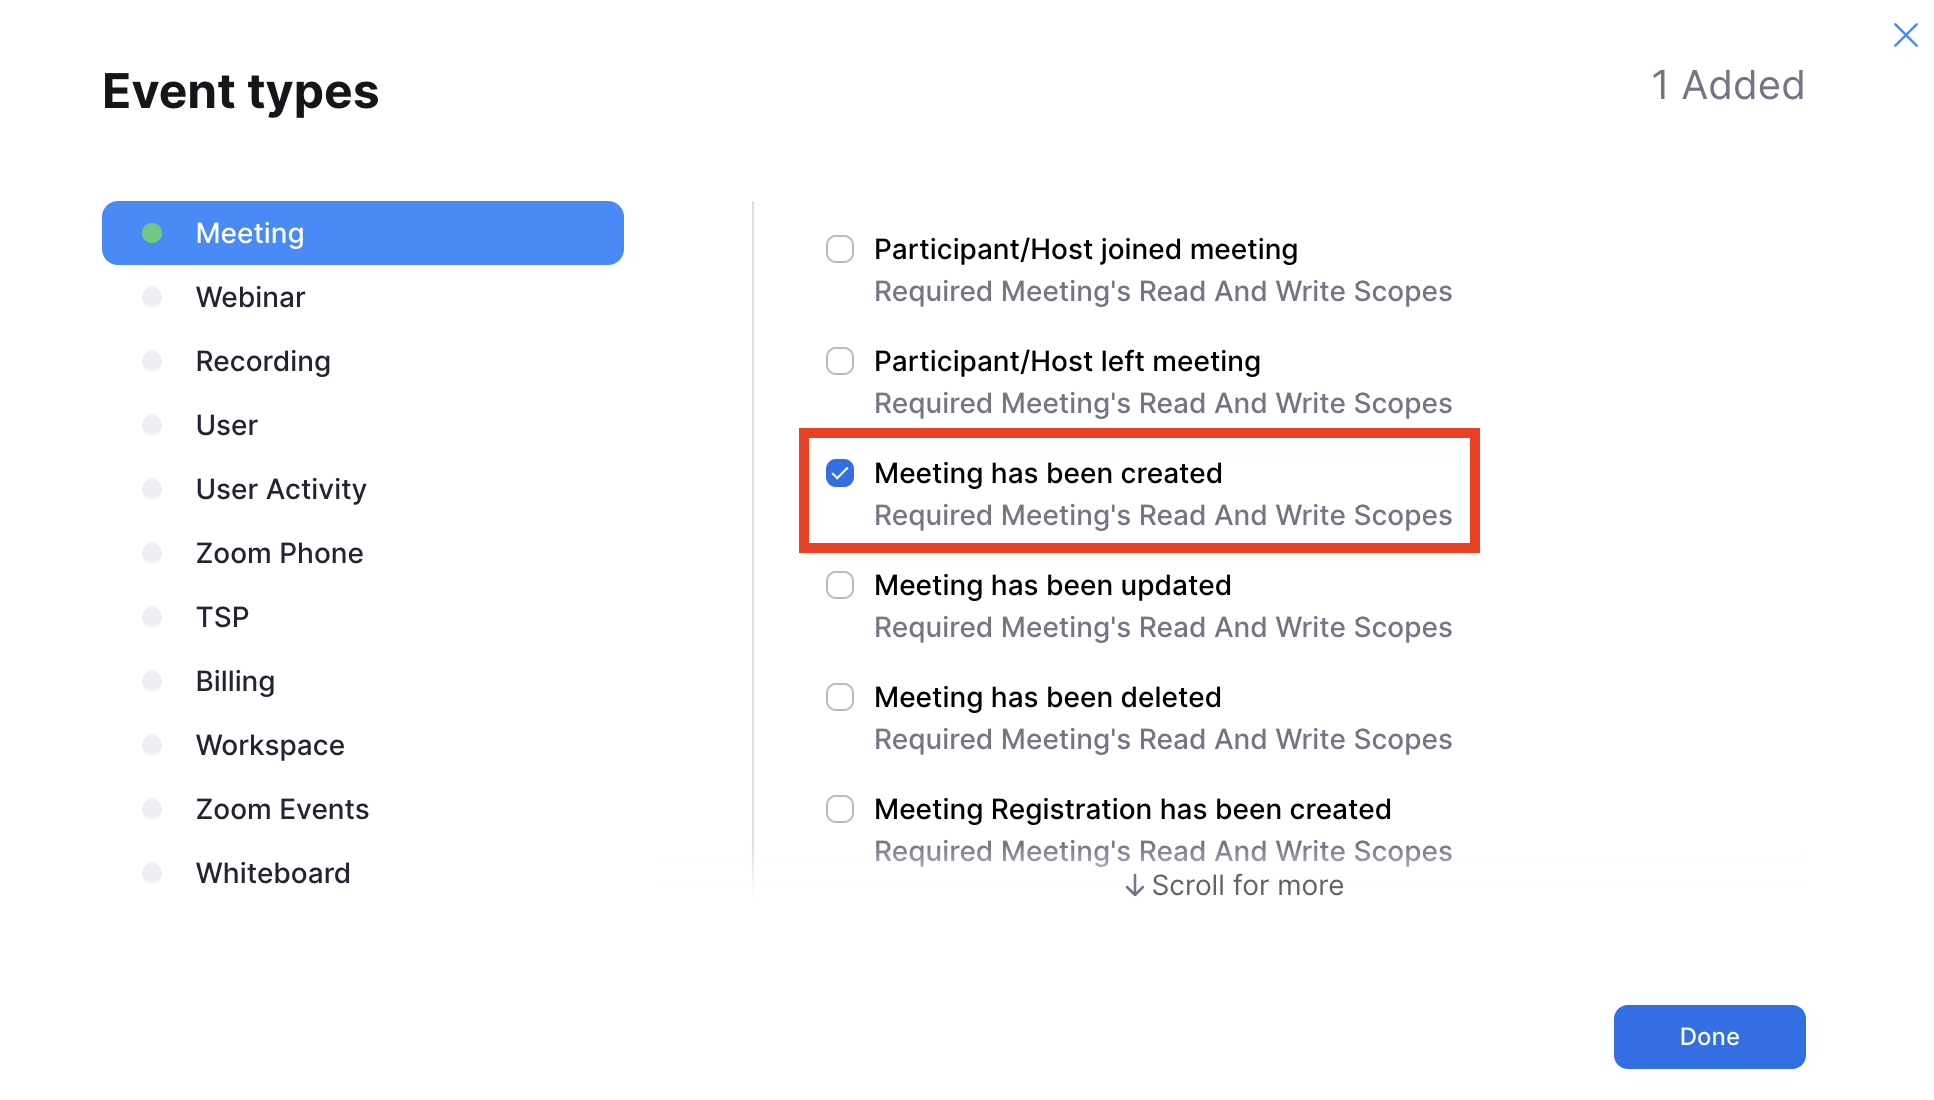
Click the "Add Events" button. A modal will show up. Select the following webhooks and then click "Done".
- In Meeting select the "Meeting has been created" event.
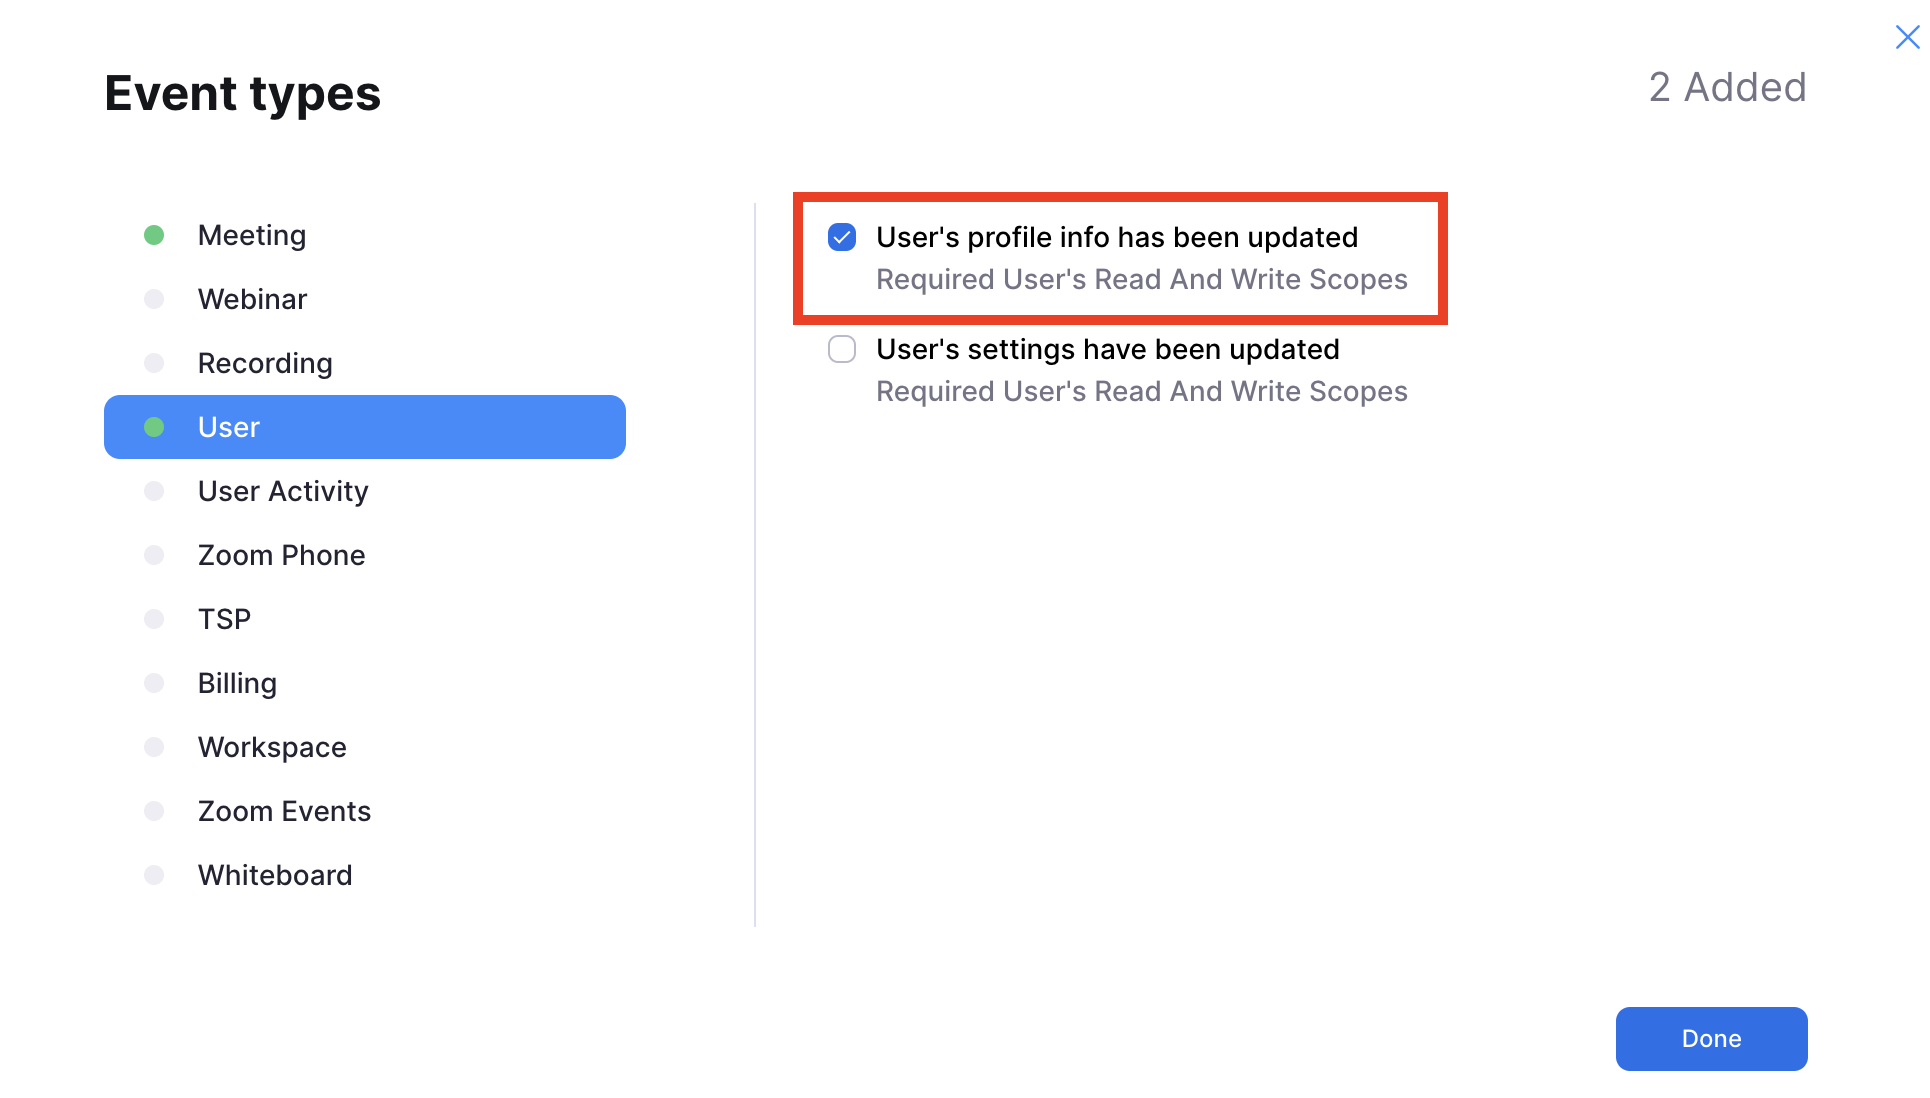
- In User select the "User's profile info has been updated event. This is required to keep the personal meeting ID of the user in sync.
Recall vs customer managed OAuth
The next (and final) step is to implement the OAuth flow for your users in order to actually connect their Zoom accounts.
Once a user has gone through the flow, (has "OAuth-ed"), you can either manage access and refresh tokens on your end or have Recall manage these for you.
In general, we highly recommend using Recall-managed OAuth by default, unless:
- You already have an integration with the Zoom OAuth API.
- You need to call the Zoom API endpoints for other functionality in your app.
Updated 2 months ago
The OAuth Flow: Connect your customer's Zoom accounts.